|
From Foe to Friend - A Jewelers Saw Tale
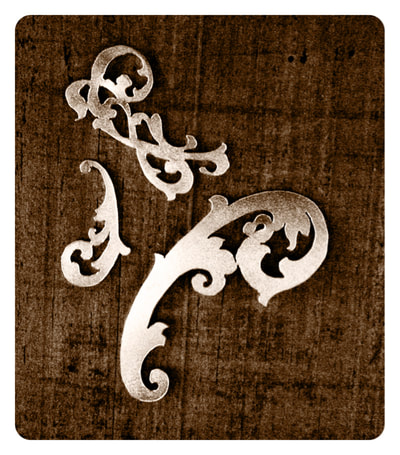
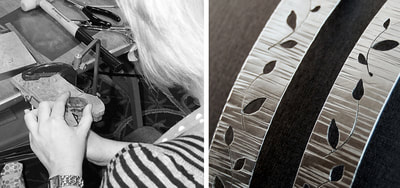
I LOVE to saw/pierce and especially like teaching others the joys of sawing as well. You can learn in one evening what took me months. Every one of my students walks away with a piece they are proud of ... or should be proud of... we can all be too hard on ourselves sometimes. Its a great class to catapult your skill level and remember, a jewelers saw is not just for fancy stuff... you'll need it to cut hand-made jump rings, tubing and very heavy wire stock. MY STORY You mean I can use this simple very economical tool to create intricate gorgeous designs in metal? I'm in. With candy-coated dreams of perfectly carved fluid forms and shapes, I bought my first jewelers saw. It was a matter of moments after bringing this deceptively simple tool home that I was faced with the reality of how little I knew about the saw or exactly how to use it. It wasn’t long before I became entirely frustrated and convinced that sawing metal might be beyond my grasp. I quite literally hated picking up the darn thing and resented its “implied” simplicity. It was clearly anything other than simple. Its not like sawing wood… AT ALL! And I couldn’t find a class or video anywhere that explained the process in detail. That was over ten years ago mind you. Now there are hundreds. I've since made friends with my saw and it has become one of my favorite tools. What I like best is the Zen-like place my mind enters when sawing (piercing)... its just me and a very basic hand-tool that allows me to create designs to drool over. TIPS In that vein I’l like to share my top tips and tricks for sawing and piercing like a boss. Have fun and maybe join me for a class or two! #1. My number one tip is to RELAX. Go for a walk, do some stretches, deep breathing … tension in your body or mind hinders successful sawing. Tension = broken blades, uneven strokes, poor steering, muscle and back strain. So take a moment and let some zen in. #2. Posture is peace. When you sit with good posture, your weight is balanced, your muscles and joints are engaged but not straining and this leads to easier sawing. Sit at the front of your chair, back straight, shoulders back, open your legs for balance, feet flat and firm on the floor… no stooping, crouching or bending, don’t cross feet or legs. My Grammy taught me that ladies never sit with their legs open but in this case, Grammy would give me a free pass… I’m sure yours would too. #3. Don’t push. LET THE BLADE DO THE WORK. Its not in your bicep or grip. Yea, I know you have to push a little but when I’m teaching newbies I tell them whatever you do, don’t push, trust me. Remember sawing wood?? You push right? Well, this is metal. No amount of pushing is going to move that blade into the metal faster. In almost every class, after repeating to exhaustion “Don’t Push”, inevitably a student exclaims, “Aha!” They look over their shoulder at me with a big ole smile and add, “I get it”. When you let the blade do the work, everything comes together nicely. #4. Tight turns or corners. You can't force them. Turning the blade isn't going to work, especially with something 45° or more. You'll just bend the blade and then SNAP, broken blade. So how to turn? How does a marching band take tight turn? by stepping in place and slowly rotating till they are facing the desired direction then off they go. Same with the blade. up and down in place. I even tend to pull backwards a little. With tiny adjustments, slowly turn the blade in the desired direction. Eventually the blade will be facing the right direction and off you go. #5. Use the whole blade. Nice long even strokes, up and down, top to bottom. These are the most efficient strokes, wear down the blade evenly and produce the less heat and friction. Keep the blade perpendicular to the metal. I like to tell students to think like a sewing machine needle. #6. Lubricate. So very important!!! You'll cut faster, break blades less often and it actually sounds better. I use a burr lube designed for jewelers. Some use wax crayons or winter green oil. Whatever works best for you but use it.
0 Comments
What does an aspiring silvermith, metalsmith or metal arts jeweler need to get started? I get asked this question a lot so I thought I’ld put together a list of tools specifically for beginners, just the basics. My list is categorized by skill or technique. I’ve included some suggestions for using household items that will work just fine until you can afford something better. Depending on your level of commitment and your budget, try first shopping at a local hardware store like Harbor Freight or Miller’s Hardware . The tools available there will most likely be sufficient for your first year or more. Don’t forget discounts. Many jewelry supply companies offer discounts for members of lapidary, craft or other groups. Ask them before you buy. Where to buy? to name a few… Rio Grande, Otto Frei, Contenti or FDJ (FDJ is in Sanford Florida and has a showroom). Good luck, be safe and have FUN
|
AuthorSonja Jeanette ArchivesCategoriesstudio | shop | classes
807 Virginia Drive Orlando, FL 32803 My studio is located inside Autumn & Ro, Orlando FL. Plenty of room for creativity, exploring and lots of inspiration. Please visit when you're in the neighborhood. Sonja has been featured on . . .
Talent | Knowledge | Skill
|
||||||


 RSS Feed
